

Here is my front door! I have been so inspired by these fall wreaths that I have been seeing on Pinterest! I decided that I should give it a whirl, even though I thought (past tense) wreaths were just for old people. :P Sorry, mom. There are so many other tutorials on the net, but I did not want to buy anything new. Well, other than the wreath form. I started with a wicker form from The Dollar Tree. Yes, $1 for a wreath form, can't beat that with a stick! I should tell you that I was inspired by this wreath.
(Step 1) I wrapped my wicker wreath form in jute twine that I had left over from our wedding favor bags. I wrapped and wrapped and wrapped until I got tired of wrapping it and then I had another idea. Ruffles!
(Step 2) I had an old tshirt that was a beautiful cranberry color. I was going to donate it, but decided it is free fabric for my stash and I'd better hang onto it. Glad I did! I cut the shirt into strips, sewed down the center of the strips and to my amazement it ruffled by itself! If your tshirt strips do not ruffle, you'll simply pull on the ends of the threat to gather the fabric up. No need to finish the edges of the strips as they won't fray.


(Step 3) Bust out the hot glue gun! I chose which side I wanted to be the back of my wreath, made sure my jute twine was secured to the form and wrapped my ruffles around the front of the wreath and secured them in the back with hot glue. I made 15 ruffles and attached 11. Id suggest making a couple/few extra since the seams popped out of a couple of mine and I didn't want to run back and forth to the sewing machine.
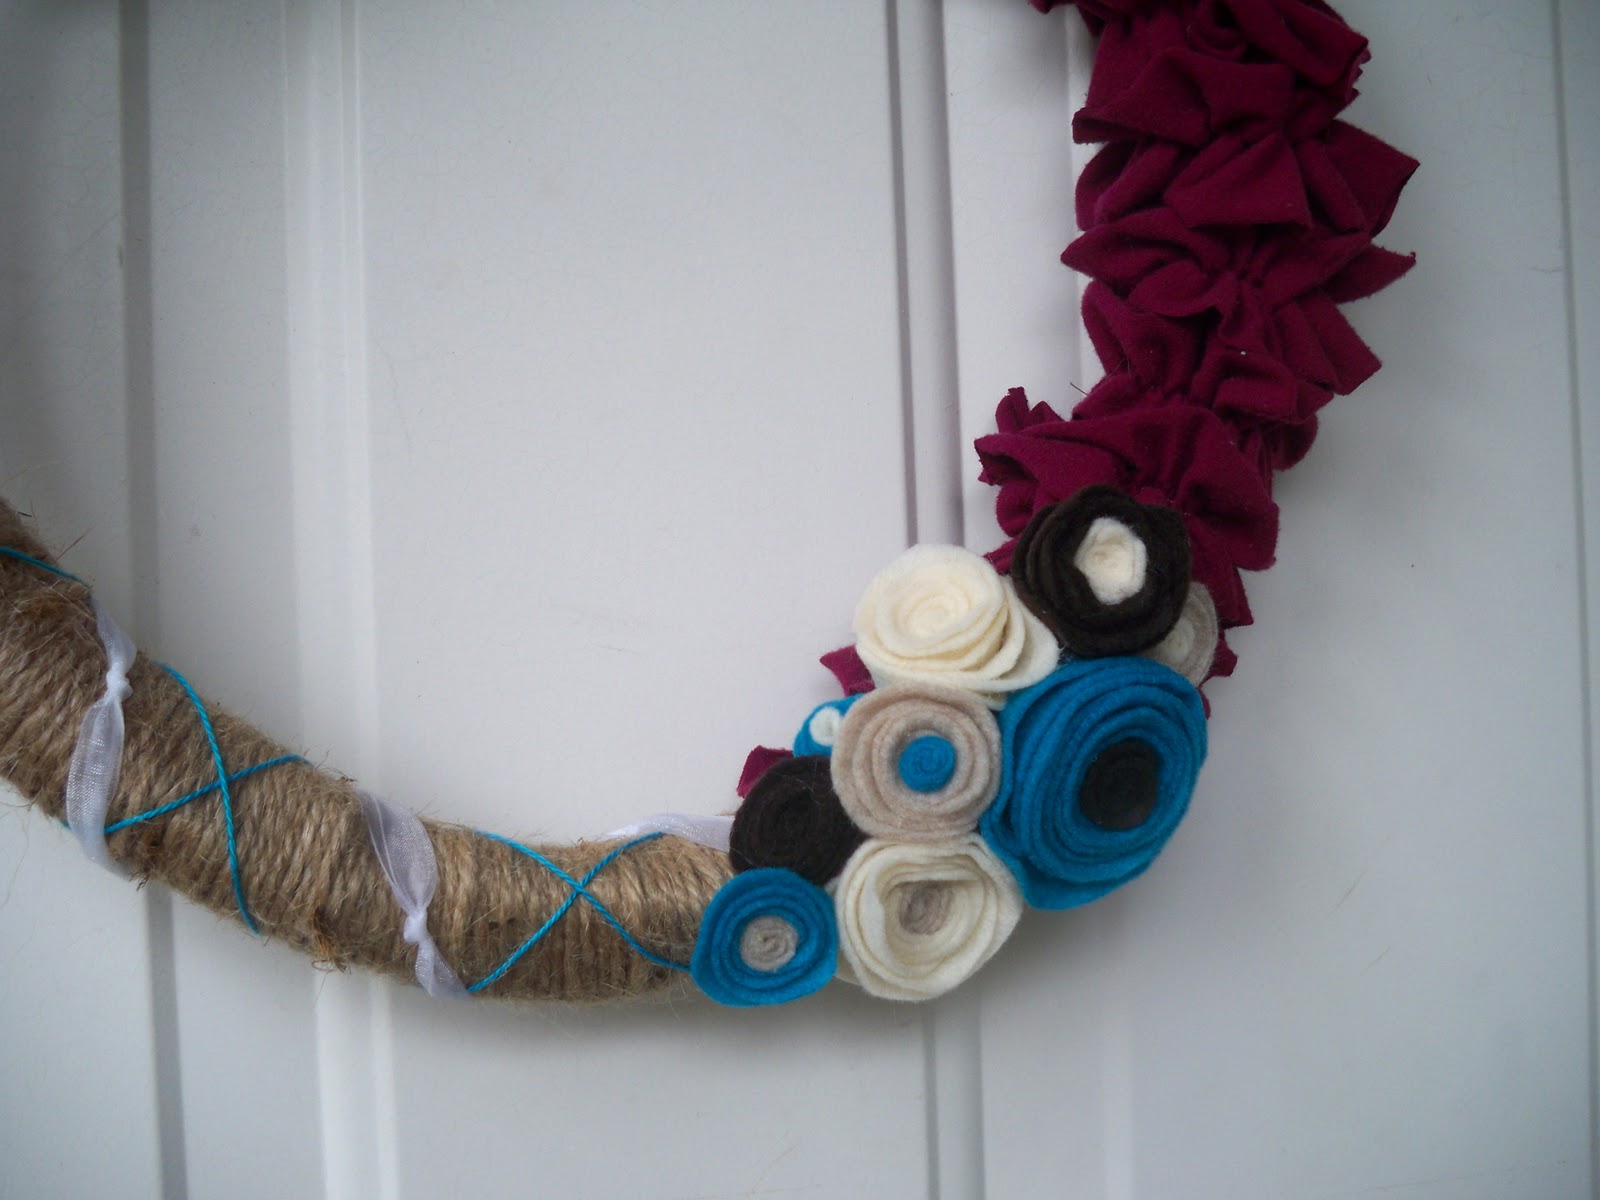
(Step 3) Pick out felt colors for flowers and scavenge string and ribbon stash for coordinating colors. From the tutorial linked above, I loved the texture of the white yarn that is wrapped around her wreath, but as I'd noted above I didn't want to buy anything new, I raided our ribbon stash and found white ribbon that I thought was too thick and then tied evenly spaced knots in it to created the texture that I was seeking. I love turquoise and found some thread in my bonus daughters' craft stash (thanks A & B)! I wound the string around in one angled direction all the way around the wreath and then came back the other way with it angled in the opposite direction. The turquoise string basically made x's all around the wreath. See photo below:

(Step 4) I wound my knotted white ribbon around the wreath, crossing the form (on the front side of the wreath) in between the turquoise x's.
(Step 5) This part is soooooooo fun- make felt flowers! This is a link to a great tutorial on making felt flowers- it'll hook ya, watch out!
(Step 6) Hot glue flowers to the wreath. I chose 2 clusters similar to the inspiration wreath (linked up above), but really you can do them however you like.
(Step 7) I looped a piece of white ribbon through the top of my wreath and hung it on the wreath hook that I got from Home Depot for only about $2.50.
Since I already had just about everything to make this wreath in my crafting stash, this project only cost me about $3.50!!
As always, feel free to contact me with questions or for tips or tricks!


No comments:
Post a Comment