Showing posts with label ruffles. Show all posts

Monday, March 18, 2013

DIY Fabric Flower Drawer Pulls

I'm really excited to share a project with y'all from this weekend for our baby girl's room!

I can not believe that I'm already in my third trimester and that I'll have a baby girl in less than 3 months! It just blows me away how fast this pregnancy has gone by.

OK, on to the project! It is very sweet and simple, but packs a lot of punch in the cuteness department :)

Take a peek!


We found this dresser on the side of the road in our neighborhood a couple summers ago on our way home from the park. It wasn't perfect by any stretch of the imagination... and we didn't care. 

We painted it white as soon as we got it home, and it was good enough for the time being. Now that I am pulling together a nursery for the new baby I wanted to glam it up a bit. 

I was inspired by this post that I have seen pinned a million times. However for our nursery the look was too clean looking and I wanted something a little bit shabbier.

So, I'll tell ya how I did it!

I used:
Scrap fabric
Sharp Fabric Scissors
Round Objects from the recycling bin
Polyurethane Spray
Scrap Cardboard
A scribe
Cheap Ikea Drawer pulls
Screw driver


1. I cut out various circles using jars from the recycling bin as a template. I chose my patterned fabric to be the back and front and my solid fabric as the middle two layers.

2. After cutting graduated sized circles, I scalloped the edge of the two patterened circles (the smallest and largest) buy just winging it. Then frayed the edges with my thumb nails. This can get very messy, so I'd recommend doing it over the garbage can.

3. I cut into the circle of my solid fabric making chunky petals and frayed them all by pulling them and running my thumb nail across them. 

Here is a photo to give you an idea of the steps above:


After I frayed all of my edges to my liking I wanted to stiffen the fabric up so my flowers wouldn't be floppy around the drawer pulls.
So...
4. I laid my frayed circular shapes out on a scrap piece of cardboard, took it outside and sprayed my fabric with a polyurethane spray. I could have opted for mod podge, it probably would have dried faster and would have been less stinky, but I didn't want to mess with getting fabric pieces in my mod podge and I was trying to make this happen as fast as possible :) 

5. I let my sprayed fabric dry for several hours in the garage.


6. The fabric pieces stiffened up just as I wanted them to! I crumpled them up a bit and layered them up biggest in the back down to smallest in the front and poked a hole through the center of the fabric with this handy tool that my husband has. It's called a scribe, and I'll tell you it worked quite nicely!


7. I stuck the screw for the drawer pull through the drawer from the backside and popped my flowers onto the front side and screwed on the drawer pull in the center. 

8. Last, I fluffed up my flower petals around the pull. I could not be more thrilled about the final product!!!


I think I'll take a little sand paper and some stain to the dresser to rough it up a bit, the white is just a little too clean looking at this point :)

 One last look up close!


You can go here for a look at the changing pad cover that I whipped up for the nursery in the same color scheme.


Later on this week I'll reveal what the rest of this closet looks like in baby girl's room!

If you decide to make your own fabric flower drawer pulls, I'd love to see what you come up with.
Hope your weekend was great and your Monday is sweet to you :)


Wednesday, January 16, 2013

From Baby Boy Clothes to Baby Girl Clothes


Hey Y'all! 
I believe I mentioned in the last post that things were starting to get a bit more girlie around here! 

I'm going to show you guys how to make or up cycle baby boy clothes into baby girl clothes!

Mr. P and I had so much fun going through his old baby clothes and picking out a preliminary batch to alter for his baby sister who is scheduled to arrive mid June.

On my pinterest board "Baby Girl" I have a miss-mash of projects to take on for her room and inspiration for diy clothing and up cycling!

Photographed above are the first round!

#1. Is one of my own designs. The polka dots made me think of sprinkles, so I stamped a sprinkled cupcake on scrap white linen, cut it out into a square and appliquéd it onto the onesie. Once it's washed a couple times, the edges of the cupcake patch with fray and look pretty cool.

#2. and #4. are inspired by this blog post of an embellished onesie.

#3. Is a simple heart cut out of white linen and I zigzag appliquéd the edges.

Here are a few more photos closer up:


Sunday, November 13, 2011

DIY A Fall Wreath- Tutorial


Here is my front door!  I have been so inspired by these fall wreaths that I have been seeing on Pinterest!  I decided that I should give it a whirl, even though I thought (past tense) wreaths were just for old people. :P Sorry, mom.  There are so many other tutorials on the net, but I did not want to buy anything new.  Well, other than the wreath form.  I started with a wicker form from The Dollar Tree.  Yes, $1 for a wreath form, can't beat that with a stick!  I should tell you that I was inspired by this wreath.

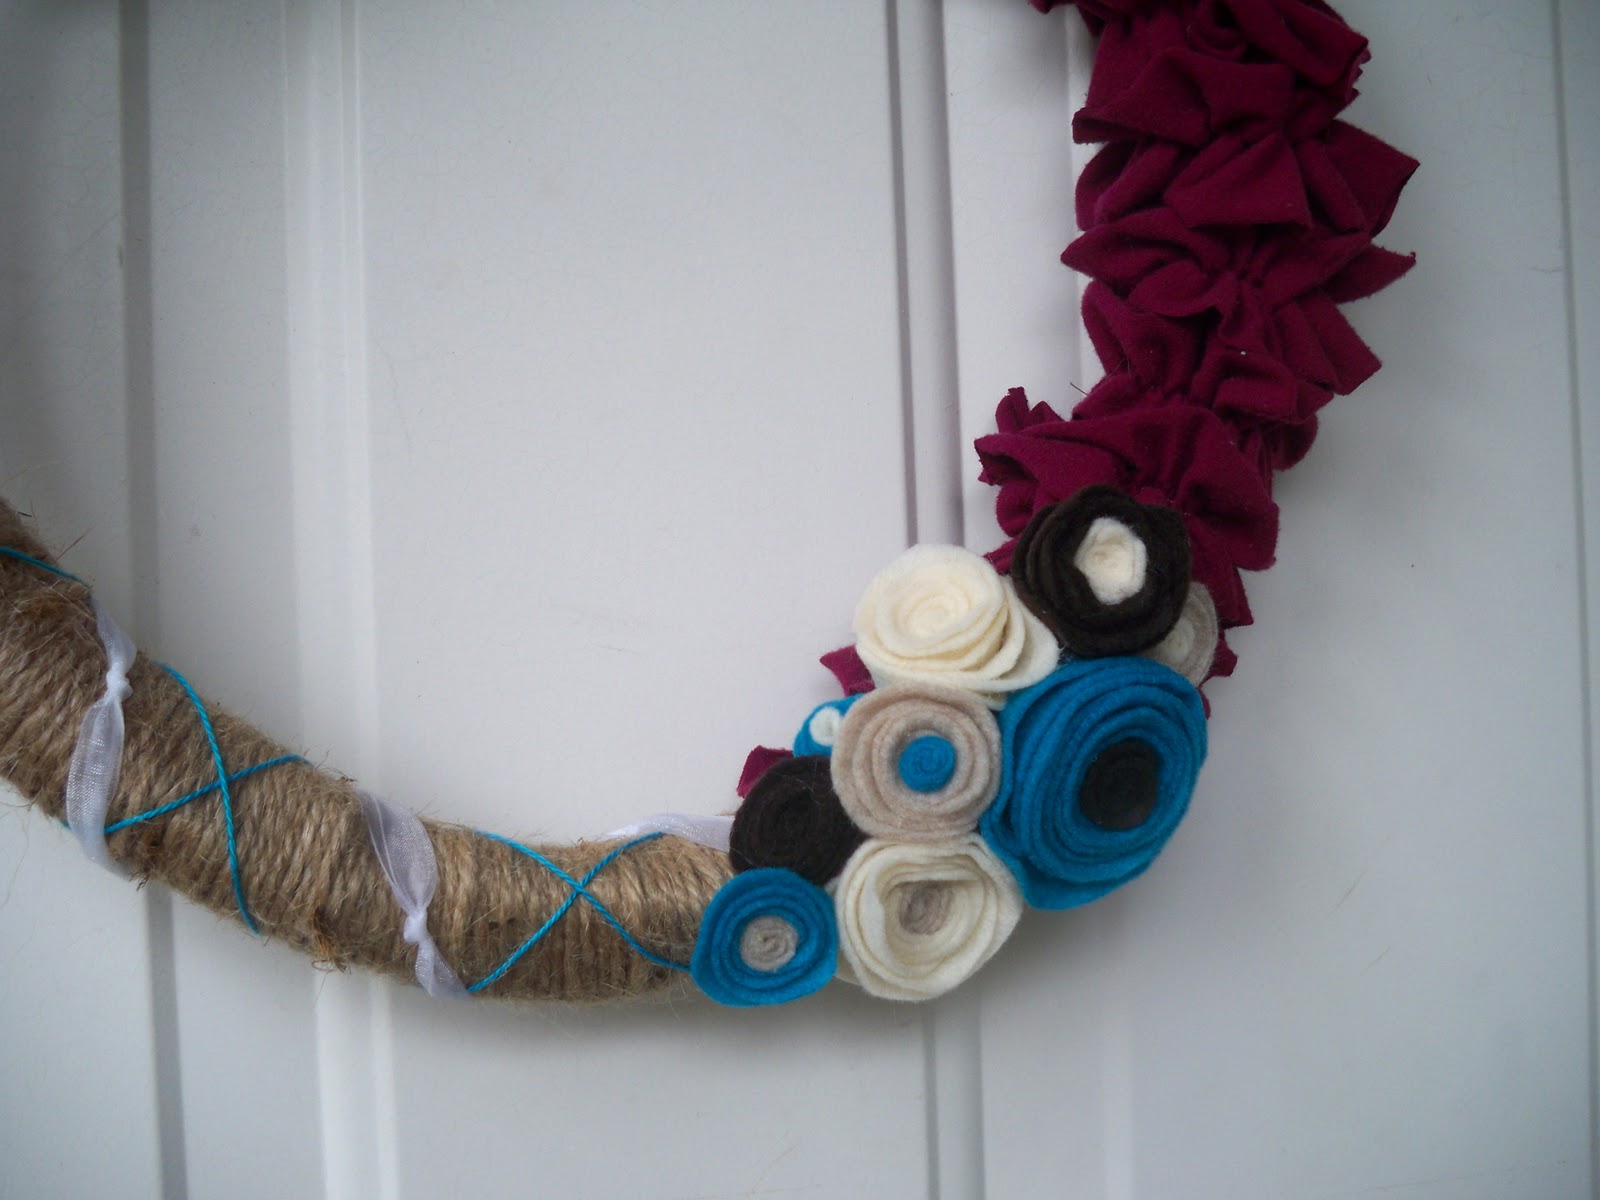
(Step 1) I wrapped my wicker wreath form in jute twine that I had left over from our wedding favor bags.  I wrapped and wrapped and wrapped until I got tired of wrapping it and then I had another idea.  Ruffles!

(Step 2) I had an old tshirt that was a beautiful cranberry color.  I was going to donate it, but decided it is free fabric for my stash and I'd better hang onto it. Glad I did! I cut the shirt into strips, sewed down the center of the strips and to my amazement it ruffled by itself!  If your tshirt strips do not ruffle, you'll simply pull on the ends of the threat to gather the fabric up.  No need to finish the edges of the strips as they won't fray.


(Step 3) Bust out the hot glue gun!  I chose which side I wanted to be the back of my wreath, made sure my jute twine was secured to the form and wrapped my ruffles around the front of the wreath and secured them in the back with hot glue.  I made 15 ruffles and attached 11.  Id suggest making a couple/few extra since the seams popped out of a couple of mine and I didn't want to run back and forth to the sewing machine.


(Step 3) Pick out felt colors for flowers and scavenge string and ribbon stash for coordinating colors.  From the tutorial linked above, I loved the texture of the white yarn that is wrapped around her wreath, but as I'd noted above I didn't want to buy anything new, I raided our ribbon stash and found white ribbon that I thought was too thick and then tied evenly spaced knots in it to created the texture that I was seeking.  I love turquoise and found some thread in my bonus daughters' craft stash (thanks A & B)!  I wound the string around in one angled direction all the way around the wreath and then came back the other way with it angled in the opposite direction.  The turquoise string basically made x's all around the wreath.  See photo below:


(Step 4) I wound my knotted white ribbon around the wreath, crossing the form (on the front side of the wreath) in between the turquoise x's.

(Step 5) This part is soooooooo fun- make felt flowers!  This is a link to a great tutorial on making felt flowers- it'll hook ya, watch out!

(Step 6) Hot glue flowers to the wreath.  I chose 2 clusters similar to the inspiration wreath (linked up above), but really you can do them however you like.

(Step 7) I looped a piece of white ribbon through the top of my wreath and hung it on the wreath hook that I got from Home Depot for only about $2.50.  

Since I already had just about everything to make this wreath in my crafting stash, this project only cost me about $3.50!!  
As always, feel free to contact me with questions or for tips or tricks!