Showing posts with label storage. Show all posts

Sunday, March 24, 2013

An organized baby girl closet!

As promised in my last post, I'm ready to share a project that we worked pretty hard on! The closet system for our nursery. 

I just LOVE how it turned out!


Did I mention that we did all of this for under $80?! 

To purchase something prefabricated would have been $120+!

As usual, we got to work pretty quickly, because when there are free time and materials we must get to work. There is mess in the first before shots from my bonus daughters as this was their room before we decided to make it the nursery. 

Before we get too deep, here is the before shot:


It was your typical builder grade closet with one bar the full length of the closet and a shelf at the top that you could only pile stuff on top of one another to fill. We ripped that out pretty quickly before we remembered to take our before shot, but I'm sure you get the gist. 


I sat down with a trusty mechanical pencil and lined notebook paper and wrote out what we needed to accommodate in this closet. For example, we have a tiny house and this is the best closet to house the vacuum, so it was necessary to build a specific place for the vacuum cleaner. Other things were onesies, swaddle blankets and sleep sacks, pants of various sizes etc. 

I started getting hand me downs at an alarming rate and so grateful I was since it kicked our butts into gear! I sketched out an idea of what would work for us in this space. The sketch is embarrassing... I'm great at many things but drawing and even just sketching out is not one of those things

We measured the closet space and adapted my sketch to the measurements to make it work.

Here is a shot during the process: 


The details:

We used these simple plastic shoe boxes on the shelves. 
Since baby socks are so tiny and tend to get scattered all over the place I also didn't want to waste a whole drawer for these. 


We still have a shelf (reused) at the top of the closet, it is just more compact. I put swaddle blankets, the breast pump and two sleeping bags up there. Probably more of a temporary storage solution at the moment, but it works loads better than the last shelf with too much room.


I separated the clothes by size which is a tedious and exhausting task!
I used the closet hanging tabs that we'd purchased when Mr P was tiny, but I'm not the biggest fan. So I used the different levels of dowels to create a better visual separation.
0-3 month clothes on the bottom and 3-6 and 6-9 month clothing on top. 
I have a storage container in the garage filled with 9+ months clothes, but I figure by then I'll be ready to go through clothing again!


We incorporated this dresser that we found on the side of the road then painted. All I really did was add the fabric flowers I made behind the drawer pulls.

Off to the left up top we added pre drilled melamine to accommodate the navy baskets from Dollar Tree. If we choose to switch things up later, we can simply move the pegs and the shelves. 


Lastly, at the bottom I wanted to be able to contain laundry and toys.
I purchased two laundry baskets from Ikea, they were $4.99 each. After researching we designed this space for the two to nestle in here side by side. 
The one one the left will hold dirty clothes and the one on the right will house baby toys.

We took the doors off since you couldn't see the whole closet or get to the middle of it. We added a dowel kit to the top just under the track and these thrifted curtains that are Pottery Barn! They were only $7.99 for the pair! Now we can close it up or open it all the way up to get to the things we need!


This is the smallest bedroom in the house and needed to have the most organized closet to make sure that life with all four kids at home this summer will run smoothly!

All I have to do is make labels for all of the baskets and bins so that when mommy brain sets in I have a system of checks and balances!

One more look at it:


The girls and Mr P will be sharing a room for the summer! 
Stay tuned on how we will make that work!

Hope baby girl's closet inspires you!


Friday, September 7, 2012

Our Pinterest Inspired Bathroom!

I have to tell y'all that I have no idea where the original image came from, if you know please leave the info in the comments section so that I can give credit where credit is due! This particular photo links up to my Home Sweet Home board on Pinterest.

Isn't this stunning?!

I found this photo on Pinterest a few months ago, and could not stop thinking about it.


LOVE THIS! shelving

Well, Happy Hubby and I got to work!

We already have the dark gray in our home, so we popped open the old can and slapped it on the wall, though we all know painting, even only one wall, takes way more time and patience than just "slapping it on..."

Happy Hubby made me some of his amazing brackets, and we painted some pine board white for the shelves and hung them. 

And this is what we came up with!


It is very difficult to photograph this little nook of the bathroom, so I apologize for the photo, but you get the gist!

Whoop! Whoop!


Here is the view from the mirror :)

Happy Hubby just framed it also, btw!

Next we will touch up the white paint, finally install a tp holder, and spray paint all that brass to look less 90's!

Thanks for letting me show off my Pinterest Inspired Master Bathroom!

Stay tuned!


Monday, April 16, 2012

This stinky desk...

This desk stinks. I'm serious. This desk smells so bad that it makes me gag... 

That is why I have been putting off doing something to it.


But it's time.


This stinky desk is getting a makeover!


Tuesday, March 20, 2012

Fabric covered wall mounted file holders

I started out with these clear acrylic wall mount file organizers. I got them from Target in the office supply section and they were under $3 each!

Those are for my office, and I had just enough fabric left over for a small project in the same area.

You know I just couldn't leave these clear acrylic file holders alone, so I sanded them down to give them a little grip.


I then slathered on the Mod Podge and wrapped the fabric around the acrylic. Do not be fooled, it seems oh-so-simple, but this is very tedious and time consuming. I got all perfectionist on it...


I mean, just look at these little corners! Make sure you really slap on the top coat of Mod Podge where the fabric overlaps!


Here they are on the wall in my office/crafting space!


I think the best part is that they will also hold a 12x12" piece of scrapbooking paper, so when Mr. P wakes up from nap and I haven't finished my page, I can throw all of the parts in here until I'm ready to finish!


I kept my overlap at the top very tidy since you can see the white fabric through. I don't mind how it looks, but if I were to do it again, I'd likely use darker fabric to hide this. 

I'll throw some labels on these babies like I did on my up cycled cocoa box stamp holder and we will be in business!

And here they are!

(sorry about the blur, not the best lighting!)

Happy Creating!


I linked up:

Tuesday

Wednesday, March 7, 2012

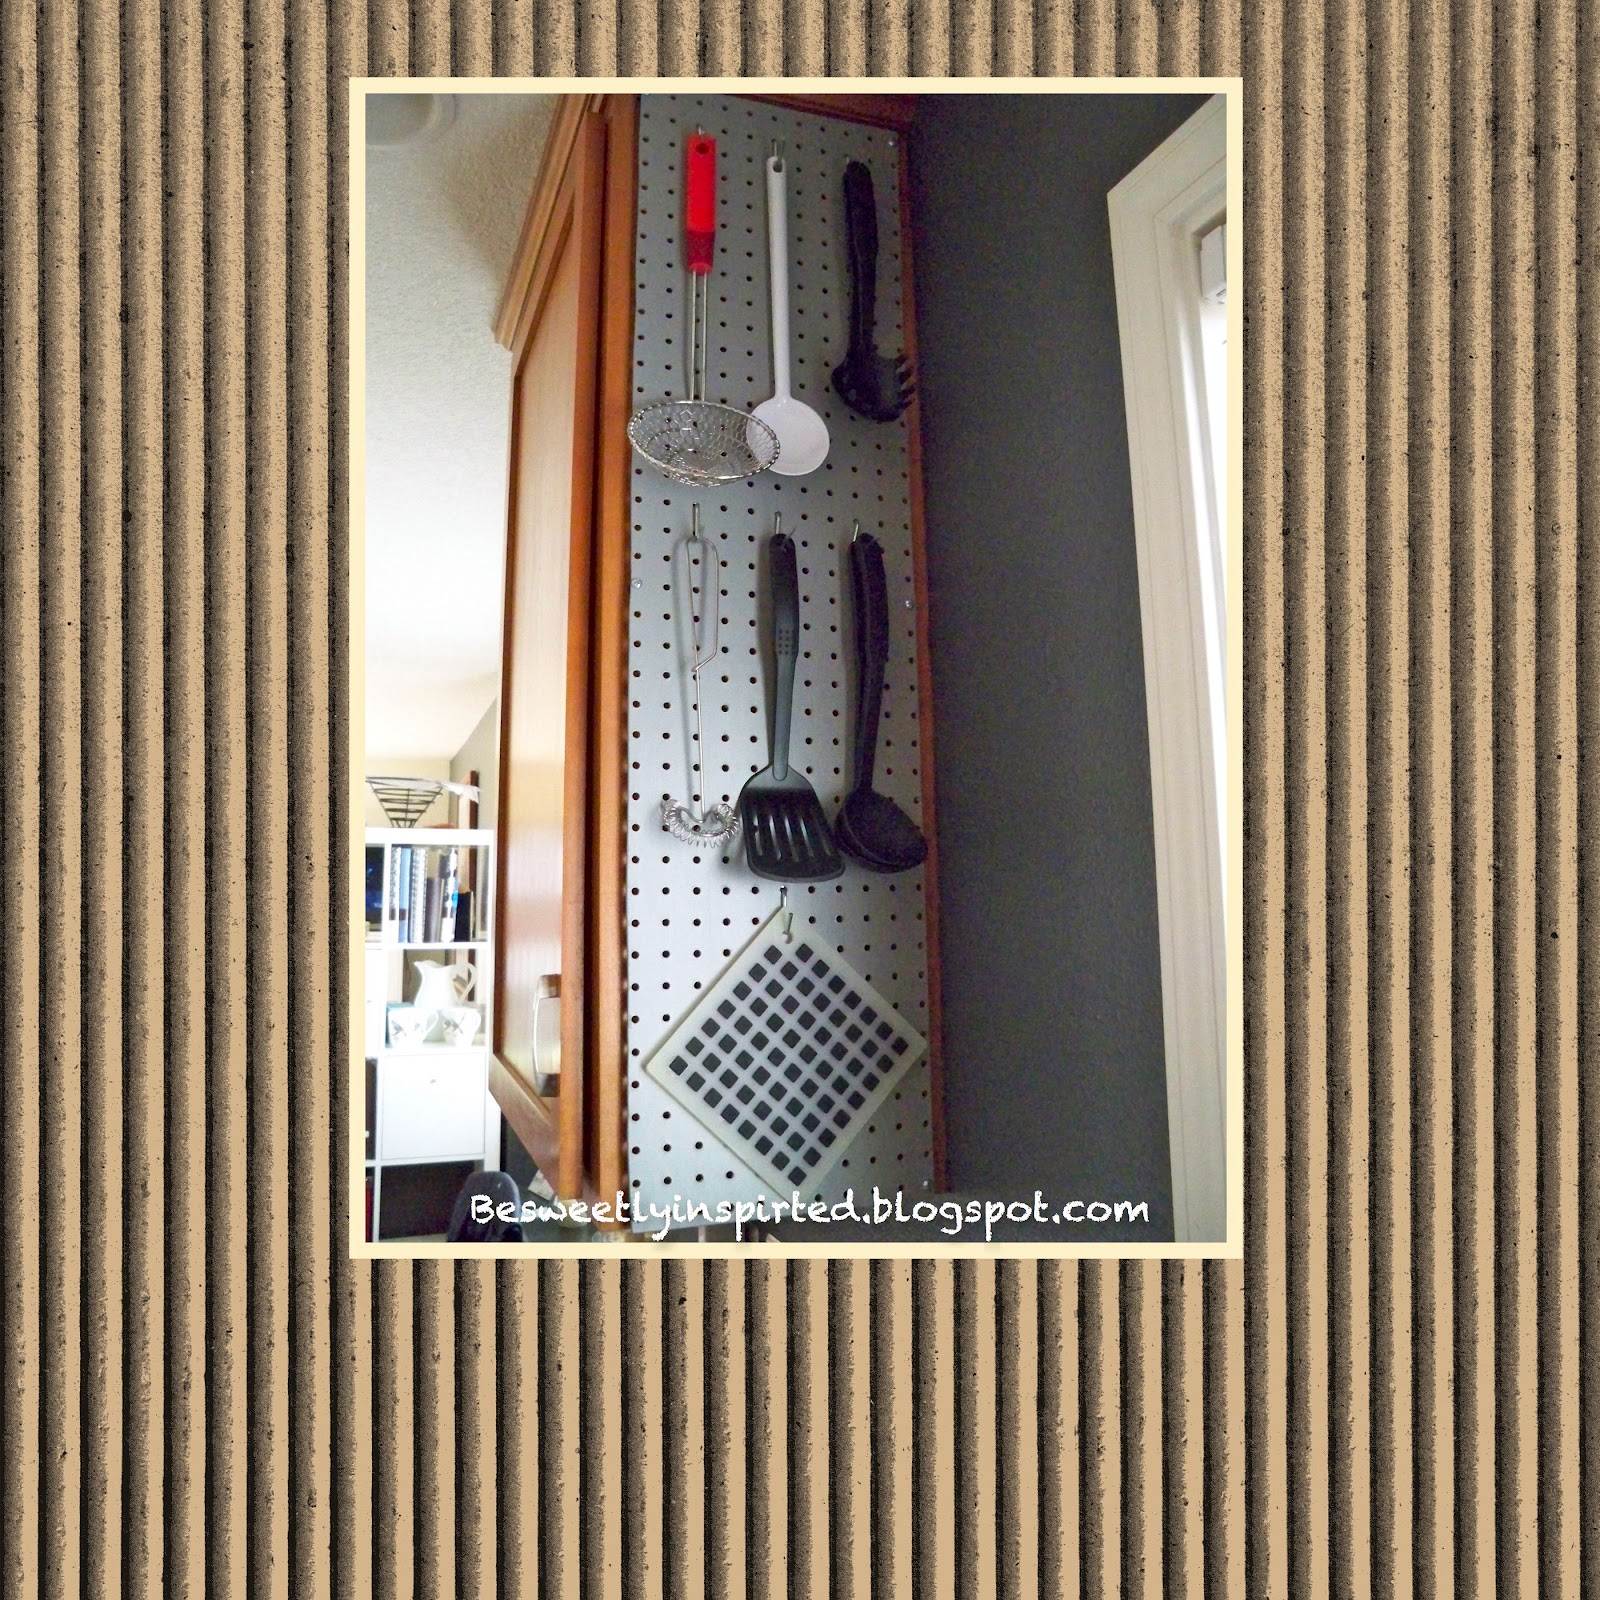
A {small} Kitchen Update With Pegboard

(I love using digital scrapbooking software for my blog too!)

This is such a simple update to our little kitchen, but it really packs a lot of punch! It looks cute, is not intrusive on our workspace, and is oh so functional!

I can feel more pegboard inspiration coming on... Maybe inside of the cabinets?!

Another peek? Here ya go:


Wednesday, February 29, 2012

Birds on a wire coat hooks tutorial

This simple and sweet update in our mudroom packs a lot of punch!

From the photos in this post, you can see that our entry/mudroom is very narrow. What you can not see, is that what used to be a coat closet was turned into a pantry (thank goodness!!).

The problem is that for the 2.5 years that we have lived in our home coats have been hanging on the back of our dining room chairs... and it drives me nuts! No matter how clean the house is this makes it look dirty and cluttered.

Very similar to the situation with my duvet cover, I could not make a solid decision about what I wanted. And let's face it, Happy Hubby is not so happy when he is continuously drilling and patching holes when I change my mind.

I picked up some Blecka Hooks at Ikea that were $4.99. Initially I intended to hang them plain and simple on the wall, but we all know I just can't leave things alone! Since the hallway is so narrow, we decided to keep it a cream color and I have the vision of a gallery wall in there. You don't see plain in a gallery. 
So, I needed to turn my hooks into some art!

Here is what I came up with:


I adore them. 

1. I got little wooden circle plaques from Michaels (don't remember how much, but I think they were around 50 cents each!) and painted them black. 

2. Laid my plaques (face down) on the backside of this rockin' birds on a wire paper and traced the small front circle with a pencil. 

3. Cut out the circles.

4. Slather a medium thick coat of Mod Podge on the front of my plaques and adhered the paper smoothing out any bumps. Once dried, I spread Mod Podge all over the paper and wood- edges and all, I like how it smoothes things out.

5. I sanded any rough spots with my 220 grit sand paper, we don't want to snag any sweaters!

6. Second coat of mod podge! whoop whoop ;)

7. Spray with a non yellowing acrylic sealer, I did 2 coats!

8. Some how measure or eyeball the circle and drill a hole to add hooks. We used wall anchors that support up to 5 lbs in the sheetrock and the same screw that you see on the front goes all the way into the wall; this is how we mounted and attached our hooks.

They make an amazing addition to the gallery, and perfect companions to this little fella I created a couple months ago!

Here is how we lined them up:


I linked up!

Wednesday:

Friday:

Friday, February 24, 2012

Refinishing Laminate Drawers- Cover your laminate with Fabric!

My last post was so... um, inspirational.

 I  Happy Hubby put this thing together for me. I found some handles out in the garage, but the screws were too long so Hubs was sent to work with them to cut down.

So this thing has been sitting in my living room all day long while we have walked around it and stared at it. 

I tried to fight the urge. The urge to change it, to do something to it...

But there it sat, boring and laminate and so...white.


And I gave in.

I found this very popular Ikea fabric I had in my stash, why not?! This baby needed some texture!
I cut strips a little wider and longer than the drawers.


Guilty pleasure: I love love love a brand new bottle of Mod Podge.
I had to capture this before I popped the top!


I sanded the laminate drawer faces with 220 grit sand paper and slapped on a medium thick coat of Mod Podge. I had never Mod Podged fabric before today!

I laid my strips on top of the drawer faces (I only did one at a time, allowing the first to dry completely before taking on the second). Since Happy Hubby had already put the thing together, I was not going to take it apart again, so I just propped the drawers open with a yoga block.

I used a brush, but fingers worked better on the edges. Plus, sometimes it's really fun to get glue all over your fingers!! I used Mod Podge to adhere the fabric onto the wood. I liked the fabric feel on the front of the drawer so I did not put mod podge on top of the fabric on the face, but I loaded it up on the sides on top of the fabric so that they wouldn't come all apart.


Here is the face of one drawer with the top edge (on the right) smoothed down.


Here is how I worked with the corners and tucked them in. I really slathered on the Mod Podge here in the corners. I'll likely seal the corners with even more later, depending on how it dries.


And here it is!


I soooooo love this! A million times better than that stark and boring white laminate! The bottom drawer is still drying in this photo. 

I used my seam ripper to poke a little hole in the fabric where the holes were predrilled in the laminate. We then popped a screw through from the front side and attached the handles.


I can not wait to finish it up!!


The top drawer has dried and I have sanded the edges a tad with my 220 grit sand paper to make them a little less sharp. It worked like a charm.

Please subscribe/follow my blog!

I'll post photos when the casters are attached and the printer is at home on top of this *now* sweet little thing!

Now I'm thinking of a million things I'd like to adhere fabric to...

Waaaaahooooooo!

What will you Mod Podge fabric on to?!

Have a rockin' weekend!
xo

Lauren D.


Creatively Living


I linked up!

Monday:

Tuesday:

Wednesday:

Friday:

Thursday, February 23, 2012

Sometimes you just have to buy it

Mr. P's schedule has been off for the past 2 days.

I honestly think that this makes him more upset than me, but I have definitely been frustrated. We have places to be, people to see, and I have projects to manage/finish.

I tried for an hour to get him to nap. He is not a "cry it out" type of guy, and honestly, I'm not that type of mom either. But today I needed just a few moments to myself and I let him cry while I sat still. He worked himself up so bad, I felt guilty and like a horrible momma and finally snagged him up so that I could get ready for our day. 

I like to dress up a little on Tues/Thurs since I don't teach yoga on those days and it's fun to (attempt to) look hot and effortless when Happy Hubby returns home from work. None of my clothes seemed to fit right, or be comfortable enough, I'm having a "fat day," and my favorite jeans have a huge hole in the crotch. 
Awesome. 
So, we went to Target :)

I know it seems counter productive, but when Mr. P is a crabby pants, taking him to the store is the only way to guarantee that we can both make it through the day.

Now that you know how lazy heavy guilty unproductive I was feeling the earlier part of today, I'll now tell you about our wonderful adventures in Target!

I try not to shop at Target too often. I like to thrift/junk/build things for my home. With too many projects on my plate at the moment and the desire to quickly accomplish something today I knew this was the right move for both of us.

We found a great parking spot (right next to the cart return- priority as a mom now!) we went right over to the baby food section and got Mr. P 2 up and up baby food squeeze pouches, his favorite treat, and my  sanity in the store around lunch time. 

I have been searching this town high and low for something original with drawers for my office space at the landing/top of our stairs, with no luck. I figured I'd scan Target, but first I had to try on jeans while Mr. P was happily slurping down his baby food pouches. 8 pairs later, I found some that were high waisted enough that I won't have the butt-crack-gap when I sit down, like all of my other pairs. Yes, my friends, I bought some mom jeans today. And they are comfortable. lol

We the headed up to the storage/organization area of Target and I found this beauty:


The idea is:
1. to get it put together
2. to add casters to the bottom
3. to place my printer on top and paper in the drawers
4. replace the drawer pulls with something shiny
5. roll this thing under my desk

We got home from Target and Mr. P went down for a nap! 

I'm rocking my new mom jeans


and attempting to put this thing together!


The moral of my story today is that sometimes you just have to make things easier on yourself.

 Sometimes, you just have to buy it... Don't you just love happy endings?!

Now, wish me luck getting this thing put together!

What have you broken down to purchase in order to complete a project quickly?
or 
How do you deal with a child who won't take their nap?


Exhausted mama hugs,
Lauren D.

Sunday, February 19, 2012

How I store my flours


I have been gluten free since 2009. 
I finally learned how to mix gluten free flours and bake gluten free in 2011.

We have a teeny tiny kitchen. Seriously, the two of us and the dog can't even fit in the kitchen all at the same time. We both love to be in the kitchen and we prepare most of our meals at home, so we have a lot of kitchen devices and food. 

Most of it is now stored out in the open and we have turned it into art/decoration. 


Happy Hubby made these outstanding corner shelves for me to store my flours and baking supplies on. He made these amazing brackets (he's great at steel work and design) and the labels on our flour jars are simply from left over clear address labels from our (DIY) wedding invitations. 


Happy Hubby collects pepper mills and this little yellow number is actually a salt mill that was a Christmas gift this year. 


My vintage Pyrex measuring cup also usually sits on this shelf, but it was in use at the time of this photo!
And I got a vintage rolling pin for Christmas 2011, so now I don't have to use a wine bottle anymore to roll out my dough! ;)


Beneath my window and shelves is an old desk (free from craigslist!) that I have redone and set up as my baking station. But that is a whole other post in the making!

If you are interested in my gluten free mix you cant find it here
There is no xanthan gum added, I add it per recipe, depending on what I'm making. For the most part, it is 1/4 tsp per 1 C of flour mix.

Whether you are Gluten free or not, I hope this inspires your kitchen space one way or another!

What is something you have used in your home as art or decor that is useful in your kitchen?

big hugs, and happy baking!

Lauren D.

I linked up! 

Tuesday: